Tuesday, December 17, 2013

Decorating On A Budget... Dining Room

Pretty mantle details
Today I continue to bring home my ABM House Tour
and share all the details with you- my lovely readers!
Our home has been furnished and decorated on a very tight budget.
Its half the fun for me; to be able to find things I love without spending our life savings. :) 
So I will share where I got everything and how much it cost, 
to show that it doesn't cost a fortune to have lovely things! 
Enjoy! :) 
Perfect painted triangles on the wall
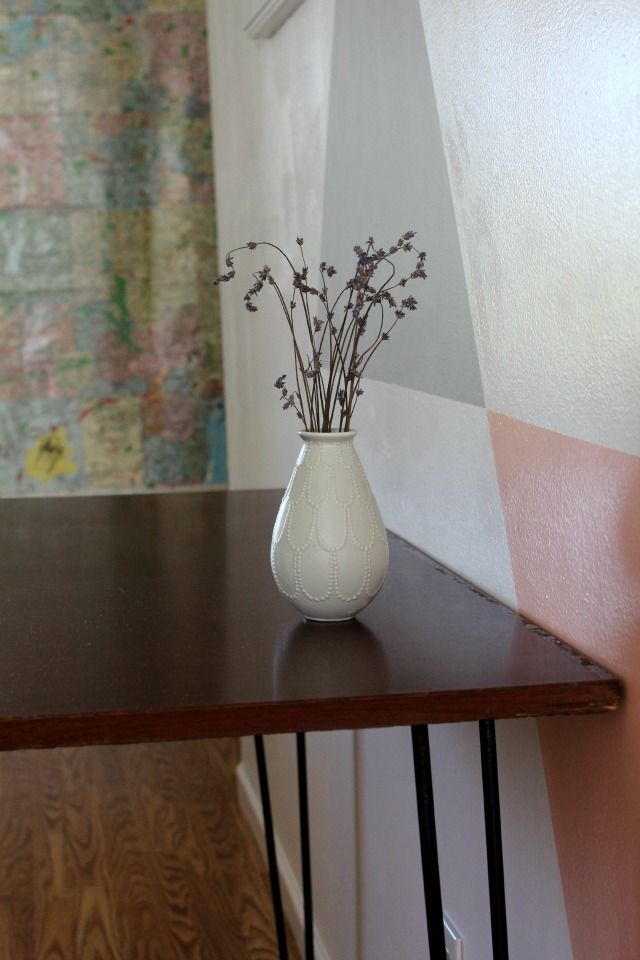
Today let's talk about the dining room!
Side Table: Garage Sale- $5
Mantle: Garage Sale- $8
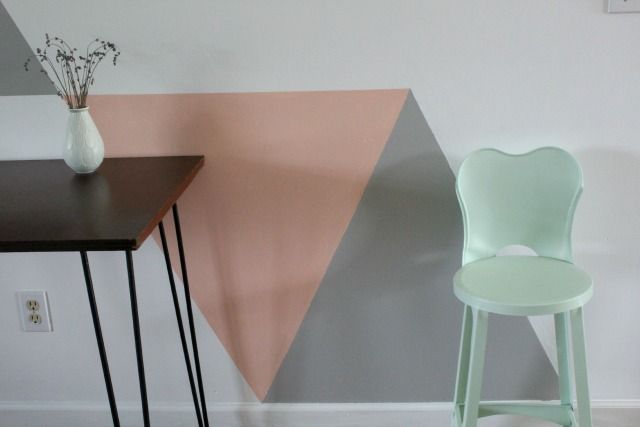
Stool: Garage Sale- $5
Boon High Chair: Amazon- $205
Napkin Holder: Ikea- $5
Vase w/ Lavender(fr Mom): Thrifted- $2
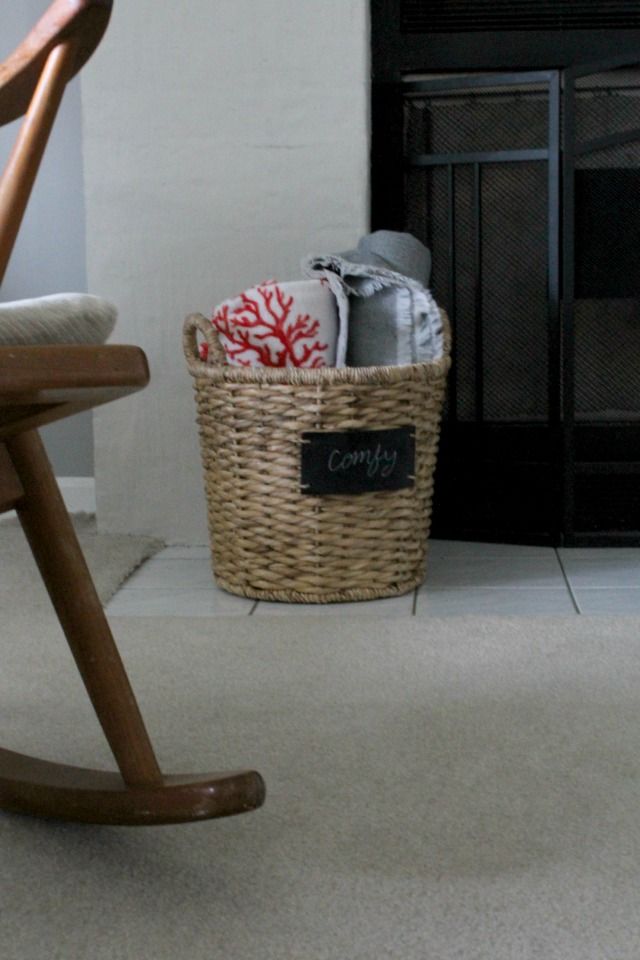
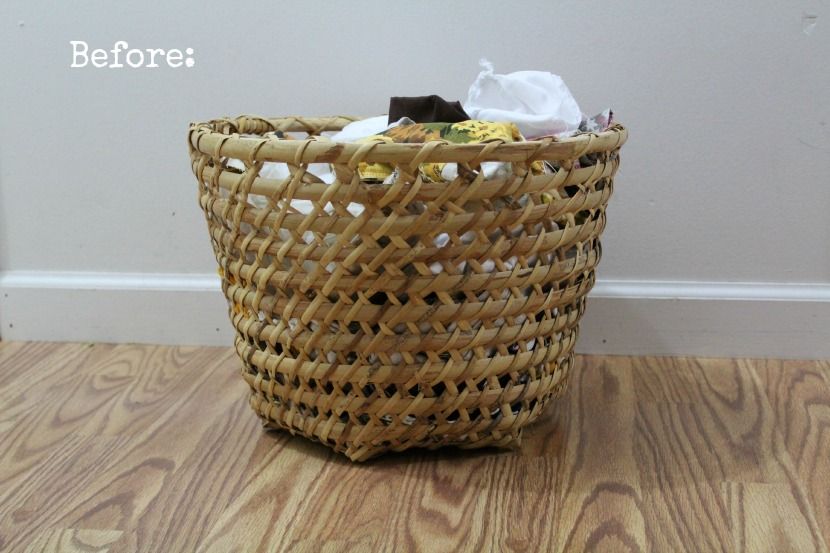
Wire Basket: Gift from Mom- $0
Pink Birds: Gift From Mom- $0
Framed Map: Made By Me w/ stuff I had- $0
Silver Music Sheet: Garage Sale- $1
Girl Drawing: Made by Friend- $0
Candle Holder: Garage Sale- $0.50
Borrowed Paint From A Friend- $0
White Geometric Balls in Basket: Thrifted- $2/ea

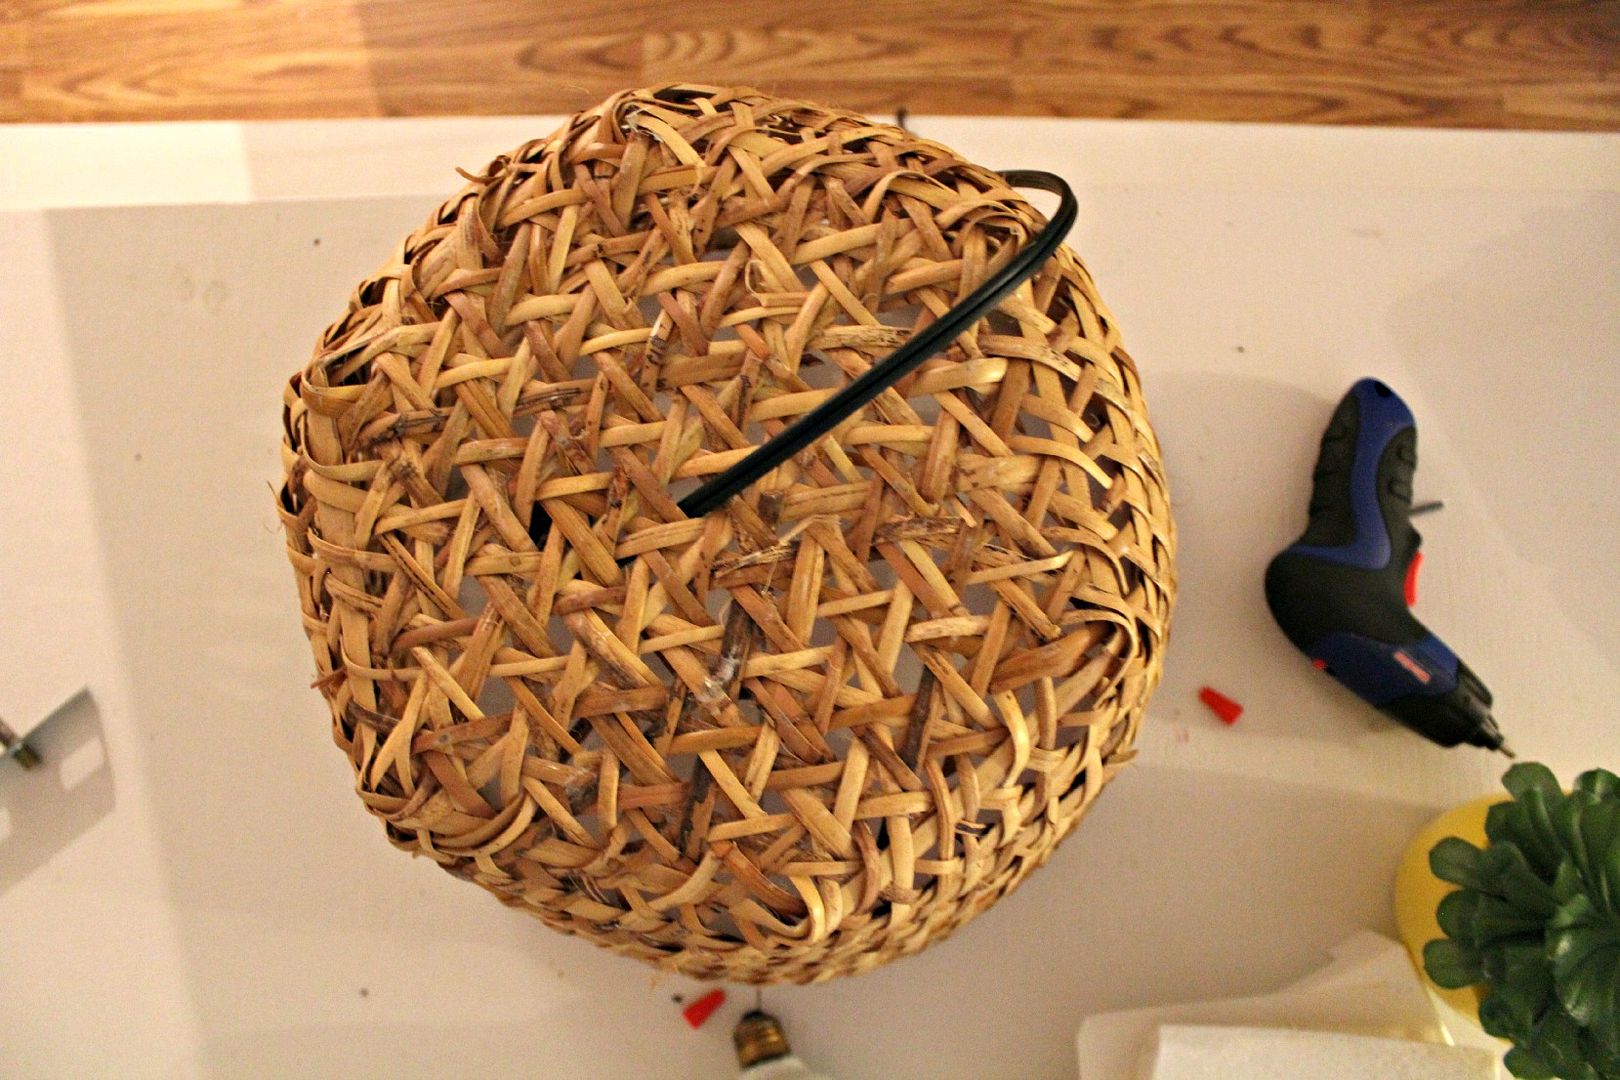
I borrowed a couple cans of paint from a friend, and taped and painted the triangles myself. My inspiration was these pics here. 
Love the colors in this room
Dining Rm Table: Consignment Shop- $60
Dining Room Benches: Given to us from our church- $0
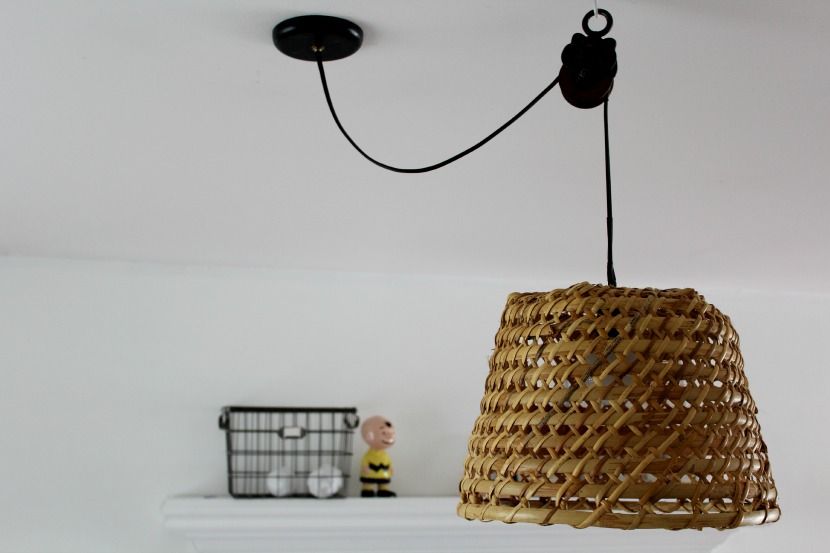
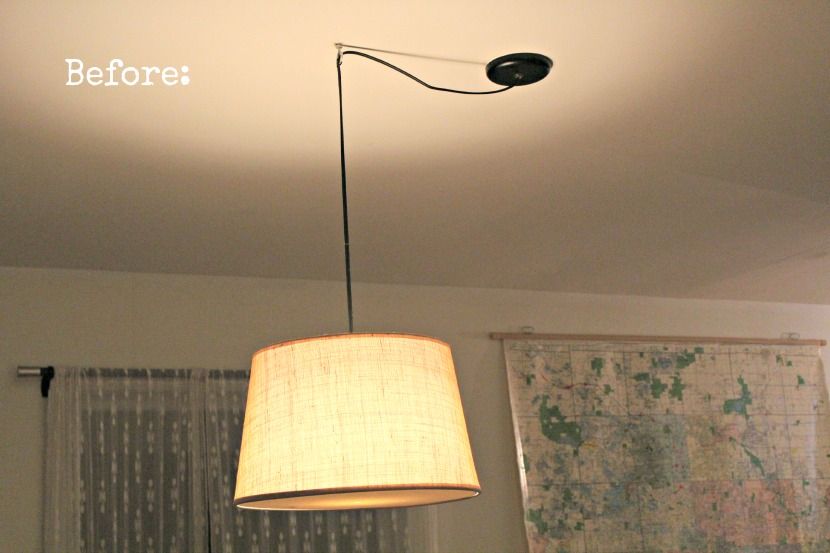
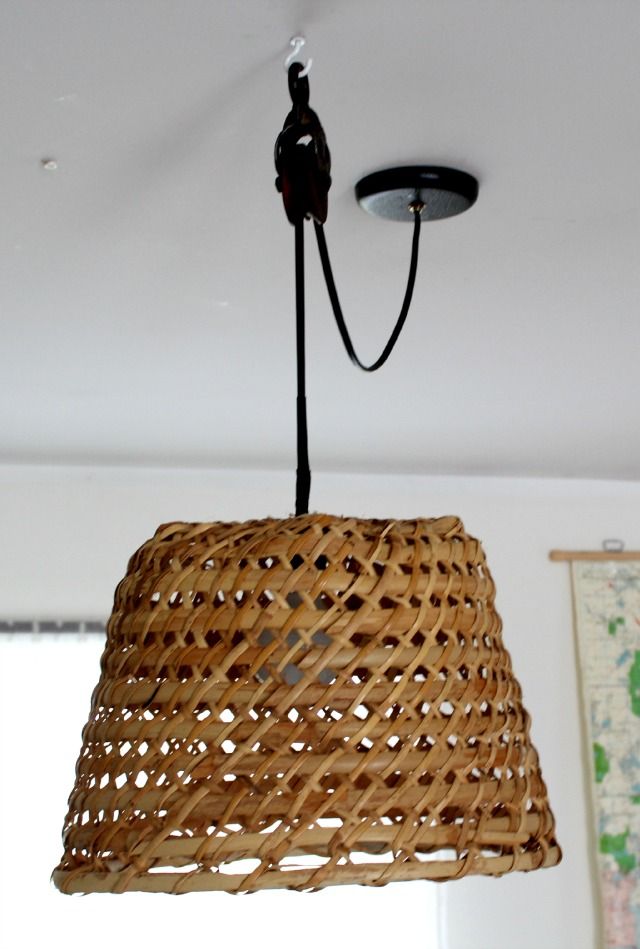
Lamp Shade Light: Pottery Barn Outlet- $5!
Chairs: Thrifted- $5/ea
Large Map: Belongs to my Mom- $0
Quart of Chalkboard Paint on Side Wall: Home Depot- $12
Paint for Dining Set: Home Depot- $50

re did my dining room set myself, turning a dark and drab set into a fun and bright spot in the room! I also painted the small metal stool. The mint color was borrowed from a friend. If you are looking for something in particular, ask around! You never know what might be in your friends storage. :)

Sooo, everything you see in these here dining room pics cost me a grand total of $367.50!! 

Like I said before...
 I had to wait for each piece. For a few years I had a table that I really didn't like, and a pile of wobbly mismatched chairs. But it was worth the wait! The set we have now is perfect for our growing family, and all of the company we always have!

Thanks for reading!!
Sylv


Lovely Christmas Giveaway! NOW CLOSED

As a thank you to all of you- my lovely readers, I have two Christmas giveaways for you! 
There will be two winners. The first winner will receive a set of three wall flowers made by me! Second winner will receive two Christmas stockings made by me, from old coffee bags (the middle one and left one in the pic)! 

To enter to win, just follow this here blog (over on the right there), and then leave a comment telling me about your favorite Christmas memory. The entrant with the most memorable/amusing/interesting comment wins! No essay required. 

Giveaway is open to US residents only. Giveaway is open until Saturday, December 21st 2013, and the winners will be chosen by me and announced here in this post shortly after. 

I can't wait to read your comments! :)
Sylvie

++Update++Thank you all who entered! I really enjoyed reading your comments. The winners are Carrie and Shannon Christine. Winners please contact me with your addresses, and I will have your package on its way soon! :) 

Wednesday, December 11, 2013

Decorate On A Budget... Living Room

Darling details
Today I continue to bring home my ABM House Tour
and share all the details with you- my lovely readers!
Our home has been furnished and decorated on a very tight budget.
Its half the fun for me; to be able to find things I love without spending our life savings. :) 
So I will share where I got everything and how much it cost, 
to show that it doesn't cost a fortune to have lovely things! 
Enjoy! :) 
In love with this living room
Today let's talk about the living room!
Vintage Couch: Thrift Store with coupon- $12.50
Vintage Doily: Grandma's Craft Rm- $0
Fabric Bird Decals: Made by me- $6.49
2 Curtain Rods: Target Clearance- $14/each
4 Curtains: Made From Target Clearance Flat Sheets- $4/each
Throw Blanket: TJMaxx- $16
Cream Pillow: Thrift Store- $3
Plus Pillow: Made By Me Using Scraps- $0

I watched clearance racks for a while for extra long flat sheets to make into curtains. I was pleased to find them for $4 each! They were more white, and I slightly dyed them with tea. Then I just folded the top over, and sewed one straight line for a curtain rod to go through. I love them! 
I also love how my doily from Grandma adds texture and interest to the space above my couch. For so cheap!! 
P.S. The book (A Long Piece Of String) and the toy (Sophie The Giraffe) are both from Amazon
Darling dots on the wall
Bramin Rocking Chair: Garage Sale- $10!!!
Natuzzi Loveseat: From my Aunt- $100
White Pillow: Made by me from an old sheet- $0
Lamp: Made by Mr. Liv- $11
Basket: Gift from Aunt- $0
Grey Throw: Thrifted- $2
Coral & White Throw: Gift from Mum- $0
Clock: Wedding Gift- $0
White Branch Decor: Thrifted- $4
Hourglass: Home Goods- $7
Lil Mushroom: Traded at Craft Sale- $0
Fireplace Update: By Mr. Liv- $13
Fireplace cage thingy: Target clearance- $15
Wall Dots: Made by me- $2

Can you believe I got that rocker for $10!!! My lovely Mum found it for me at a garage sale. You can find similar ones on EtsyThis one here is very similar. My brother redid the underside of the seat for me using seatbelts from an old torn apart car. 
Mr. Liv made the lamp using an old lamp like this one. I found some wood balls at a garage sale, he drilled holes in them, shortened the lamp, stacked the balls onto it, painted it, added a Target clearance shade and tada!! 
Our fireplace was originally outdated brick. Mr. Liv covered it with concrete grout, just using a trowel. Then I painted it with paint I had chilling in the basement. The lines you see are just spaces that he left with no grout to make it look sorta like its three slabs of rock. Kinda. ;)
P.S. The toy arrow is made by me, and the toy wood duck was thrifted.
Neutral living room
Coffee Table: Dad made in High School!-$0
Mirror: Garage Sale-$10
Wall Flowers: Made by me- $0
Basket: Consignment shop- $16
Fuzzy Blanket: (Hawaii!!) Kmart- $20
Doily Throw: Gift from Mum- $0
Grey Tray: Consignment shop- $1
Wood Bowl: Consignment Shop- $1
Little Porcelain Deer: Thrifted- $2
White Frame: Garage Sale- $1
Gray Paint: Home Depot Oops Paint- $5
Couch on the right: Aunt- $200
Slipcover On Couch On Right: From a friend- $0
Buck: Mr. Liv- $? Does this count? Hunting is expensive... Mounts are expensive... Hmmm.

Work with things that you find or have in your home already!
Our local consignment shop clears things out for $1 after they've been there a while. I keep my eyes open for those deals and grab them up. 
These wall flowers are the first set I ever made, using found materials. Almost every person who walked into my living room commented on them, and told me I could sell them. So, I added them to my shop and well, I do sell them now! :) 

P.S. Those are just Hot Wheels cars in that bowl. :)
Love the wall hanging with birds

So my dears, everything (decor, not the kids!) that you see in these pictures cost me a grand total of: $501.99. That's it! And I am perfectly happy with it. 
Just like My Bedroom, I had to wait for each piece. I also had to deal with ugly stuff while I waited. But it is worth it! I can have a lovely place that I enjoy looking at, without going into debt. And you can too! It just takes patience. And lots of hunting around. :)

Next room up is my dining room... keep your eyes open for that!

Thanks for stopping by!!
Sylvie

Disclaimer: I did not include The Buck in the decor price... This is because it was not bought as a decor piece for me. It was Mr. Liv's. And it was hiding on the stair wall for years before I decided to embrace it and add it to my decor. Also, it would be hard to figure out an exact cost. There is all his hunting clothes, deer tags, bow and arrows, etc.. plus taxidermy! So. You get the point. ;) 

Monday, December 9, 2013

Decorating On A Budget... My Bedroom

Lovely words
For the next couple weeks, I will be bringing home my ABM House Tour
and sharing all the details with you- my lovely readers!
Our home has been furnished and decorated on a very tight budget.
Its half the fun for me; to be able to find things I love without spending our life savings. :) 
So I will share where I got everything and how much it cost, 
to show that it doesn't cost a fortune to have lovely things! 
Enjoy! :) 
Love this bed!
Let's start with my bedroom! 
Bed: Craigslist- $300
Both Night Stand Shelves: Garage Sale- $5
Trunk: Made By Father in Law- $0
Duvet Cover and Shams: Target- $20
White Sheets: Wedding Gift- $0
Folded Blanket: Garage Sale- $1
Silver Lamp: Thrift Store (was originally new from Target)-$10
Small Lamp: I've had since childhood- $0
Vintage bedside Clock: Gift from Mum- $0
Paper Decor: Dollar Tree $2

I wanted to add interest to the empty space above my bed, but didn't want to spend $$. So I used paper! Do not underestimate the power of paper in your decor! The plus sign/ Swiss cross garland I made using 2 poster boards cut into crosses and then sewed them together on my sewing machine. I simply typed up the butterflies print and printed it off. The llama is a clip art that I printed and drew a frame around. I cut out the rest of the pieces from extra paper I had, and taped them all on the wall using washi tape from my stash. The books under my clock are a food book borrowed from Mum, and my journal. 
Oh, that chair!
Dresser: Thrift Store- $30
Chair: Garage Sale- $5
Foot Stool: Garage Sale- $1
Fabric & Paint to Redo Chair & Stool: $18
Pot in Window: Garbage Picked- $0
Candle Holder: Mum's Basement- $0
Beaker Vase: Target Clearance- $4
Little Basket: Local Consignment Shop- $1
Wood Bowl: Local Consignment Shop- $1
Diamond Art: Made Myself with stuff I had- $0

When I found the chair and stool at garage sales, they had old ripped vinyl on them. After much reading and videos over at Miss Mustard Seed, I reupholstered them myself! I got the duck cloth and fabric paint from Joann's, and used coupons on everything. I saved money by not doing any piping on it, and I like it that way! To make the flowers, I made freezer paper stencils to slightly resemble Marrimekko Unikko Print. I painted the fabric before upholstering the chair. 

P.S. My moccasins are thrifted, my sweater is from Love Culture, and my glasses are from Zenni (for super cheap!!!). 
Darling little baby nook
This little baby nook is in the corner of our bedroom. 
Crib: Garage Sale- $10
Abacus: Traded at Craft Sale: $0
Blanket: Made with yard of soft fabric and a Sharpie!- $5
Pillows: Made with linen fabric and paint- $4
Mobile: Made with scraps- $0
Rocking chair and crocheted blanket in front: Gifts from friends- $0

This corner is quite handmade! :) 
I will share more on how to make that mobile soon! 

So my friends... to make my bedroom into a lovely place that I enjoy looking at cost me a grand total of $417.00!!
(This of course doesn't include mattresses, I am assuming you already have those!)

Yep. Don't feel like you can't afford to make your home cute!
These things all slowly accumulated over time. 
And I didn't spend money on anything until I found things I loved.
Our bed was on the floor until that bed showed up on Craigslist!

What do you think? 
Are you looking forward to more of these budget posts?

Sylvie

Sunday, December 8, 2013

"At Home With Sylvie Liv" Today at ABM!

Today a lil tour of our home is featured here at A Beautiful Mess!
I'm serious guys! ...And I'm waaay excited!!! :)
I am honored to have been chosen in their wonderful "At Home With" series. 
Come check it out HERE!
If you are visiting from ABM, welcome! I hope you find inspiration here and stay a while! :)

Have a lovely week my dears!
Sylvie

Pssst... Come back later this week for a stellar giveaway!!

Wednesday, November 20, 2013

Shrunken Cashmere Sweater To Cowl Scarf Upcycle No Sew Tutorial

Do you have a cashmere sweater that has shrunken but you can't bear to part with it?
Here is the perfect solution! Turn it into a cowl neck scarf. With no sewing involved!
Just cut across the sweater under the armpits with fabric scissors!
Yup! That's all! Now pull it over your head. Done.
Since the sweater has shrunken, it does not fray when cut!

This is the perfect fast, easy, and affordable DIY Christmas gift for that special someone in your life!

I have sure been enjoying it on these cold days here in Michigan. 

Sylvie :)


Monday, November 18, 2013

Serging Tip: How To Easily Finish The End of a Serged Seam Tutorial

Here is a quick little tip for you on how to finish the end of 
your serged seam to keep the threads from fraying.
When you get to the end of your seam, continue to pull the fabric, and serge an extra thread "tail". 
Thread that "tail" through an extra large needle.
Push the needle back through the last couple inches of your seam- just under the stitches, and then back out.
Trim excess thread and you're done!!
Now you don't have to worry about the ends of your serged seams fraying on you! :)

Happy Sewing!
Sylv

Friday, November 15, 2013

Turn A Basket & A Pulley Into A Light DIY

I get SO excited when I can redo something in this here house, 
and make something I love happen without spending a penny!!! 
So. I turned my scrap basket into my dining rm light (pulley was kicking around in Mr. Liv's Shop). Squeeeel!!!
We had just a plain shade hanging there. It was fine. But kinda boring.
So my sweetest hubby took it down, threaded the wire through a pulley and the bottom center of the basket, and hung it back up!
I am in love!! (With him and my new light!)

Well folks. I was going to do a tutorial on how to take down your ceiling light, redo it, and re hang it... butah... I am not really much of an electrician actually. And Mr. Liv did it so fast, I was standing there on the table with my camera stuttering and fiddling with my camera settings and the next thing I knew- TADA!!!! Mission complete! Husband back out in his shop. So. I'm sorry friends. No tutorial. Ask your Hubby or your Dad for help. Or maybe Google it?! 

Thanks for reading!
Really. You guys rock.
Sylvie

Wednesday, November 13, 2013

Plus Sign/ Swiss Cross Pillow Cover


Here is a easy and fast project for ya'll to tackle! 
It took less than an hour to make, and I love it! 

To make it I used an old pillow, some flat cotton from an old skirt and a piece of felt.
I used this simple tutorial to make the cover. 

Am I the only one who just can't buy pillows full price!?
It is SO easy to make pillow covers for your old ones!

Happy Sewing!
Sylvie 

Friday, November 1, 2013

Easiest Pumpkin Seed Recipe, Pumpkin Carving, & Up In the Night

Want to know the easiest way to cook pumpkin seeds?
I love that these pumpkin seeds are not as woody as others I've had.

I learned this easy pumpkin seed "recipe" from my sweet neighbor, 
and I'll never make them any other way again!
Just rinse the seeds, pop them into microwave steamer dish w/ a lid,
mix in a lil salt to taste, and pop it in the microwave for 6-8 min 
or until they're dry! Stir them once or twice while cooking.
That' s it! :) I like to add other seasonings too with the salt. 
Some ideas are- Paprika, Cumin, Black Pepper, Red Pepper...
This year we had a Batman pumpkin, and a polka dot pumpkin!
Mr.Liv sharpened the end of a 1" metal pipe for me,
and I used a rubber mallet to pound it through the pumpkin. 
I do say I have the most handy husband!!
And well, here I am, up in the night with baby Liv, a bowl of rice cereal, and pumpkin seeds. 
Baby Liv decided it would be a better idea to hang out in the kitchen together than sleep, 
so here we are!

I hope you all had a fun and safe Halloween! :)
Thanks for stopping by!

Sylvie

Wednesday, October 23, 2013

Easy- Best Moist Baked Chicken Recipe Ever Ever Ever Ever

I am absolutely positively serious guys! This is the best chicken recipe known to man. 
It always works. It is super easy. Really. You hardly have to handle the raw chicken! 
It is soft and moist and flavorful and it is good as leftovers.
Did I convince you yet? You've got to try it! Hang on.
I'm going to the kitchen now to eat some leftovers...

Ok! Ready or not! Here it is.

Ingredients:
6 Lg Chicken Breasts
Olive Oil
1/8 cup Italian Seasoning
1/3 cup Grated Parmesan Cheese
1/8 tsp Cayenne Pepper
1/2 tsp Garlic Powder
Salt and Pepper to Taste

Directions:
Preheat oven 350 degrees.
Drizzle a layer of olive oil in bottom of 9x13 pan.
Place 6 chicken breasts into pan (they should be tightly packed in).
Drizzle chicken with more olive oil.
Mix remaining ingredients in a bowl, and then sprinkle over top of chicken.
Cover with tinfoil. Bake 60-70 minutes or until chicken is just cooked through. 
Remove tinfoil for last 5-10 minutes.
Serve in pasta, salads, soups, sandwiches, or on its own!

Let me know if you try it!! :)
Enjoy.
Sylv

Friday, October 18, 2013

Upcycled Baby Gift Tutorial For Boy or Girl

Yep. I made another shirt and pants baby outfit!
This one is definitely a favorite of mine! :)
First, I dyed a onesie using a little black Rit Dye.
Then I used this homemade stamp tutorial to add a feather on the front. 
I'm sure loving feathers lately!
(Don't forget to put something thick between the shirt layers! 
I used a few layers of wax paper this time.)
For the pants, I used a tee shirt that was getting bored sitting in my closet...
 I made the pants using this tutorial. I used the shirt hem for the bottom hem- big time saver!
There was enough fabric left in the middle of the shirt to make a matching hat. Yay!
I just traced a baby had I had, adding an extra "peak" at the top...
then I used a pencil eraser to turn it outside out... and then tied it in a knot.
I also made a matching pacifier clip, but didn't do a tutorial on that.
I did do a different pacifier clip tutorial last year- you can find that here.
Other similar upcycled baby outfits I have made can 
be found here, here, here, and here.

Happy sewing!
Thanks for stopping by. :)

Sylvie